Wednesday, July 28, 2010

Measuring Oil mixtures for PPG

There are a number of mixing containers for sale on PPG websites that are designed to calculate the ammount of oil to add to your gas in various percentages from 24-1 to 100-1.

I've tried, or at least looked closely at a few of them over the years, and found that none of them are really ideally suited for PPG.  

They are best suited for mixing large volumes of oil, but not really great at giving an accurate measure for small amounts like a typical 50-1 mix for a single gallon.  

Mixed oil doesn't stay stable all that long, so its really best to mix up just what you think you'll need that day, or for that weekend. Gas doesn't store very well in general, but gas mixed with 2-stroke oil stores particularly poorly.

You can buy a purpose-built syringe called the Hopkins MixMizer that is designed to accurately draw a measure of oil from one container for transfer into a gas can, but this device leaks residue, and doesn't contain product well for transport. Its available here, http://www.thefind.com/garden/info-2-cycle-oil-mix-ratio along with a few other mixing tools including the Accu-Mix bottle, and the Ratio-Rite Flask.

"Quick-2-Mix" that lets you select and measure various different fluid mixtures from 24-1 to 100-1.
Unfortunately, it is large, bulky, and doesn't seal very well. Consequently, it leaks in transport, and gets things messy even if it's only containing residue. As a vessel to transport two-stroke oil for mixing on the road it's hopeless.

Another problem is that it only gives me a choice of a 50-1 level for either five-litres of gas, or for a US gallon. It doesn't tell me the measure for an imperial gallon or four-liters either. My (Canadian) gas cans aren't marked for US gallons, and won't hold five litres. So for me, as a tool for measuring oil mixtures, the Quick-2-Mix is pretty much useless.

Furthermore, the Quick-2-Mix flask is something of a blunt instrument for measuring out small amounts. It's harder to register the lower curve of the meniscus in such a large, wide (2 3/4" diameter) container that can potentially hold almost a litre of oil. A teaspoon (5 mL) plus-or-minus, is hardly noticeable, even if you take a moment and squint at the level marking, but 5 mL more or less, is nevertheless important for doling out the 80 mL required for a 50-1 oil mix for a four-litre final product.

Narrow containers, are far superior for measuring small volumes with exactitude, which is why labs use flasks to get an initial reading of a liquid, and narrow, graduated cylinders to get a final reading of a fiddly amount like 80 mL for a 4-liter dose, or 2.5 ounces for the smaller US gallon.

The most effective solution I've found is in having one or more small containers that contain the exact pre-measured dose of oil that can both store and travel safely.

Just look around and choose, reuse/recycle a container that suits the size of your gas container, according to the ratio of gas to oil that you like.

Most guys I know fly 50-1.


For a US gallon, look for a (US ounce) 2.5 ounce bottle. Just make sure it is 2.5 US ounces, and not UK/Imperial ounces.

A US gallon contains 3785.41 mL. Divide that by 50 - equals 75.71 mL (2.56 US ounces)

Try your pharmacist for a freebie, something that will hold your single-shot dose.  Liquid medicine bottles often have child-proof lids, so there is less danger of accidental spillage during transport.

This container by Medela for carrying infant formula,  http://www.amazon.com/Medela-80-Single-Storage-Bottle/dp/B002QFY4OA seems almost perfectly designed for oil-dosing for PPG.

It has two top-out marks on each side.  The 80 mL top-out is perfect for a 50-1 dose for a 4-liter gas can.  The other top-out level (a little bit lower) marks 2.5 ounces, which is perfect for one US gallon.  

It's made of transparent, unbreakable plastic, has a wide-ish, easy to fill neck, a broad, non-tippy base, and has clear, easy-to-read graduations, (mL/US ounces) and a solid, non-leaking cap. 

Best of all, it is a narrow cylinder, so it is easy to fill to a line, and get an accurate read of the small volume of fluid contents within, with only just a glance. 

Small plastic bottles abound in practically any size you might ever want. However, the measures that a manufacturer claims, are often not perfect, so it is well to test their claims for accuracy first.

Ounces, like gallons, mean different things in different countries, as do traditional measures like pints, cups, and even teaspoons.

One Teaspoon US is 4.93 mL (usually rounded off to 5 mL without much problem), while one teaspoon UK is 5.92 mL which is closer to 6 mL.

To make matters worse, many conversion sites are inaccurate, giving rounded off, or completely inaccurate numbers. Some internet sites incorrectly assert that an Imperial gallon is equivalent to five litres, when in fact it is much closer to 4 1/2 litres. (4.546 mL in fact.) And some bottles claim 2.5 ounces is equivalent to 80 mL, 90 mL, and 100 mL depending on who's ounces are being measured, and how well.

It's nuts, but at least a millilitre (or a CC) is a millilitre everywhere, and as much as someone may dislike the metric system, at least it's consistent.

Here's a handy and reliable conversion table on a page that will also allow you to convert specific amounts.  http://convert.french-property.co.uk/

Here is another exacting converter


Thursday, July 8, 2010

Stuff sack or Concertina bag REVIEW


On the strength of a youtube video, I recently ordered a concertina bag from Parasupply. It's called a Cocoon II G.

A week or so earlier, I had purchased a different concertina bag from an ebay store, but didn't like it much, so I can give you a personal, side-by-side review of two different bags.

The ebay seller shows two videos on his listings, one by Cross Country, The Xertina, and the Cocoon by Parasupply, neither of which are the product(s) he sells. The bag he makes appears closer to the Xertina in design, and Parasupply now makes this newer bag, a purported advancement on the one shown in the video.

The color of the ebay concertina bag can be pre-specified, which is nice, as I wanted red to match my glider's colors, but my first impression of the product, was that the product
seemed a bit expensive for a simple, closed tube of nylon with a zipper running down the center. As for overall quality, if you or your girlfriend had knocked the thing out on the home Singer machine, you might think it wasn't too bad a job, but it's clearly not made in any factory.

It also has a single ¾" webbing-strap with which to grab the bundled Mylars, when you start folding your glider, and it really needs two. The first time out, I had so much trouble trying to secure the accordion folded Mylar on my wing, that I abandoned the attempt until I could get hold of another strap, and ended up just storing the wing back in the old stuff sack.

Back home, I reviewed the online how-to videos for using the bag, and watched the video of the Parasupply model with more attention. I could instantly discern that here, was obviously a superior, better engineered product.

The Cocoon bag has two strips of mesh running down both sides of the bag's length to vent air when packing, and the newest model, the Cocoon II, has a wide (12") mesh and velcro band, which makes bundling the mylar a breeze. First time out, the wing was packed up tight and small in a matter of minutes.

I'm not too crazy about the color, (predominantly lime green with a grey base, black accents, and the `Parasupply' and `Cocoon II' logos printed in white and pink) but it's made substantially better. It's heavier, (589 grams) robust in appearance, and the afore-mentioned side-vent mesh, and the broad, 12" wrap/band to keep the Mylars neat and flat are total deal closers. There are also draw-string closures on each end, instead of sewn ends, presumably to better void trapped air.

A final positive is the availability of an extra-large capacity Cocoon for bigger wings.

The manufacturer/designer has obviously worked with wings in the bags they make, and has put some thought into ways to improve the packing process with this second generation Cocoon II.

Oddly, the Cocoon II, is cheaper, at only $45.00 (Currently on sale for $39.00 and $14 shipping)
compared to ebay guy at $57.00.

Shipping for both was fast, each having arrived in under a week.

UPDATE: Just got an email from Parasupply notifying clients that the 4th generation Cocoon (4G) is now in production and available in three colour options as of July 10, 2010

Digital Wind Speed Gauge Review


SMART SENSOR

I don't like it as much as the Windtronics units that I've used in the past,

http://www.windmaster2.de/windtronic.htm

Nevertheless, I like the price, averaging about $12.00, plus ten-dollars shipping on ebay, direct from China. I've trashed two Windtronic units so far. (I dropped one, and drove away from the field with another unit magnet-mounted to the roof of my car and it's now lost somewhere out in wine country.)

At a cost price of about $100.00 per, this was becoming ruinious.

This unit from seller yeungs2008 on ebay, listing as New Digital Wind Speed Guage/ Wind sport Anemometer. I also reads ambient temperature as well, something I rarely worry about, but still counts as a feature once in a while.

It can also tell you the max speed, and average speed, but you have to scroll through the settings to find them, and scroll back to the original setting, all of which counts as a con when compared to the Windronic which has all three of these data available at the same time on the screen.

PROS:
- Price. You can buy four or five of these for the price of one Windtronic.
- Smaller, and lighter than the windtronic. Fits in many cell-phone cases.
- Easy battery change out, and recessed on-off switch.
- Temperature readout, and wind chill calculator when temp is -0 degrees.

CONS:
- On-off, scroll-set functions are not intuitive.
-Directional impellers. (You have to point the unit into the wind like almost all anemometers that I've ever seen, with the exception of the Windtronic.)
-Automatic shutdown after 15 minutes. Some might think this a plus, but I'd rather turn the machine off when I want to, rather than have to constantly turn it back on because I have to.
- Digital readout is kind of small, and letters are harder to read. Unit does have a backlight option, which turns on by pressing any key.
- No tripod-mount screw to attach to magnet, tripod, pole, etc. Easy mod, however. I just JB Welded a 1/4" nut to the bottom of the unit, and it will now accept any standard 1/4 inch mounting option. I used the magnet attachment from my Lightman strobe, but all you need to home brew one, is a magnet, a screw and some more JB Weld.

WINDTRONIC

PROS:
- Nice, big, easy to read numbers.
-Displays three sets of data simultaneously. Current wind speed, as well as average speed (since unit was turned on) and the maximum recorded speed. This info is useful to understand at a glance how the wind is gusting, which is crucial to safe flying.
- Multi-directional impeller vanes, read the wind from any angle. Cool.
- Tripod mount screw, and available magnet mounting accessory.
- Large, friendly letters. Easy to read without reading glasses if that's an issue for you.

CONS:
- Very finicky on/off button. Extreme care must be taken when storing the unit, or it will turn itself on while in its case, and you will find yourself with a dead battery.
- Finicky battery installation. I've had two of these, and both units had the battery off centre to the battery access hole, which made changing the 3V cell a little frustrating.

ADVANTAGE = Windtronic. Worth the extra money. I'm now on my third unit. (Sigh.) Whenever I take it out of the storage case, I clip the case to my steering wheel, so hopefully, I'll never drive away with it stuck to the roof of my car again.

IPHONE WIND APP

NOTE: If you happen to use an Iphone, there is a .99 cent app for these guys that turns your phone into an anemometer. I link to it in my iphone flying apps page. It's pretty cool.

The stand is a homebrew, an inexpensive Iphone hard case with some velcro on the back, and an angle bracket. I tapped one hole for a 1/4" x 20 standard tripod screw, and there you have it. I fits on a cheap mini-tripod, or can actually stand by itself if you angle the brace back a few degrees from right-angle. Easy-peasy.

Thursday, July 1, 2010

First Aid


Prop strike injuries can resemble battlefield trauma.

So, you might ask yourself, who knows more about treating battlefield trauma than the US Military?
Here is a USMC medical kit that contains everything you're ever likely to need on your worst PPG day ever. In a single MOLLE compatible pouch you have a two combat field dressings, Quick clot, a one-handed tourniquet, and some other stuff.

New, these kits cost around 100 dollars, but DOD regulations say that these packs must be rotated out every five years, and post-dated kits go up regularly on ebay for typically around 25 bucks or so. All the component parts, however, are individually vacuum sealed, and I’m convinced the shelf life for vacuum wrapped cloth bandages is many times longer than five years.

Quickclot, if you don't already know, is a very valuable tool in dealing with serious blood issues, even arterial bleeds. It is a sterile pad pretreated with a hemostatic agent that absorbs the water part of blood and speeds coagulation.

A granular version of the product is shown used to treat a gunshot wound in the movie “Shooter.”

Quickclot Sport packs, are available in 25 and 50 and 100 Gram sizes. Soldiers carry the 100’s but you can use several smaller pads as you need to.

A (very graphic) training video can be seen here, showing Quick Clot being used on a deep wound, and also the use of a military pressure bandage, (H compression style, a Cinch-tight bandage, and a combat tourniquet. (All of which are included in the USMC IFAK kit)
http://www.youtube.com/watch?v=6nRylQ-mJgI

The Quickclot is a potential lifesaver. Ebay online stores have small packs of “Quickclot Sport” for about 10 bucks, and its probably the single most potentially valuable item in my kit. I keep another one in a cargo pocket in my unit, so I'll always have one close at hand while flying.

The IFAK kit has a pouch containing a 4" x 16" sterile gel-soaked burn dressing. Great bit of kit. Also a couple of omni-useful triangular bandages, some Providone-Iodine solution and some miscellaneous bandages. Even some Iodine water purification tablets. I kept them in the case. Why not?

However, I did remove one H-bandage, and one compression bandage from the trauma pouch to make room for some other gear, to make what I feel is a more appropriate Aid Kit for civilian/PPG use.

I suggest filling the space with an aluminized emergency blanket, an Ascheman chest seal, a one way CPR barrier, a couple of pairs of latex (Nitrile actually) protective gloves, some boo-boo bandages, a mini pair of shears, and a haemostat clamp. Most useful of all, of course are Advil and Tylenol and ASA. Tylenol (Acetominephin) is your best over the counter pain killer, for use when bleeding is present, as both Advil (Ibuprophin) and Aspirin (ASA) are vasodialators and hamper blood clotting. Advil is my choice for use as an anti-inflamatory to ward of muscle aches the next day.

The whole kit fits into a MOLLE pouch about 4" x 6" x 7" and can be carried on a belt or a drop-leg rig.
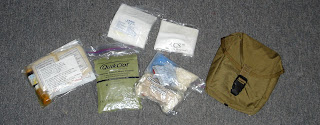
OTHER STUFF: Sprains are commonplace in PPG, so I keep a MINIMUM of three instant Cold Packs nearby.

Cold packs are sealed bags containing separate compartments of chemicals that when squeezed, mix to promote an endothermic reaction that feels cold to the skin. The cold effect only lasts ten to twenty minutes once they are activated, and you'll want to keep any sprain iced for a longer period than that to reduce the inflammation (swelling) that follows, so extra cold packs are essential to have any hope of getting to some real ice, or an emergency ward.

I keep a bottle of saline solution in my big FAK in the car. Sterile saline is good for both cooling burns and wetting burn dressings, and for eye irrigation and wound cleaning.

DID YOU KNOW? That simple burns are often more about nerve trauma than actual tissue damage? Keeping a simple boo-boo burn under a running tap for five minutes or longer, can chill the nerve endings and largely eliminate or reduce consequent swelling and discomfort. Keep the burn under uncomfortably cold running water for quite a bit longer than you think it needs. If it still hurts when you take the affected area out from under the tap, put it back in.

I hate burns. Take the time to do this, and you'll save yourself hours or days of later discomfort.
The short term discomfort of very cold tap water on your skin will be offset by way of reduced injury, less trauma, and faster recovery.